HAProxy ALOHA Load Balancer Load balancing DNS service
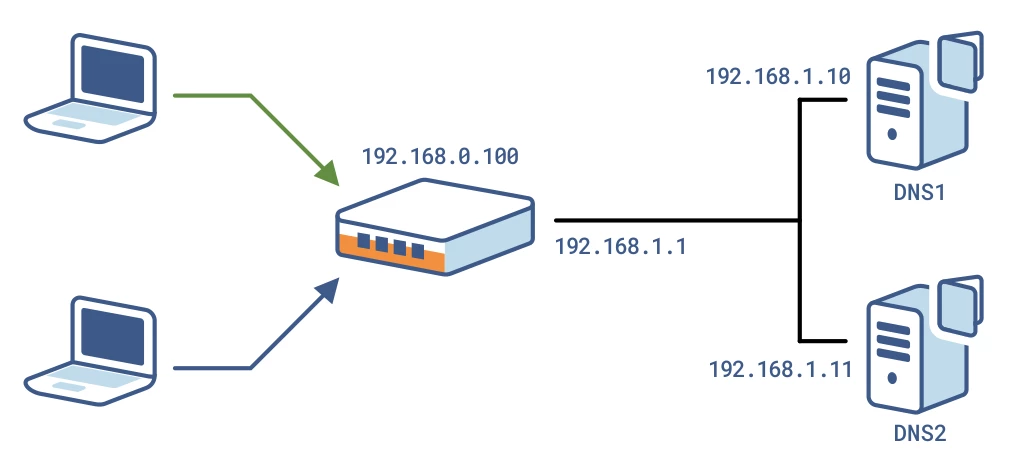
Target network diagram

Context
The clients will use the DNS service on the IP 192.168.0.100.
The ALOHA load balance traffic to the two DNS servers 192.168.1.10 and 192.168.1.11.
The ALOHA is configured in NAT mode using LVS/layer 4 load balancing service.
LB Layer 4 configuration
On the GUI, click on LB Layer 4 tab, then add the configuration below:
director dns 192.168.0.100:53
	balance roundrobin
	mode nat
	check timeout 2 interval 5
	option tcpcheck
	server server1 192.168.1.10:53 weight 10 check
	server server2 192.168.1.11:53 weight 10 check
Click on [OK], then [Apply].
Note: you need to allow TCP protocol on your DNS server for the health check.
LVS service configuration
If your lvs service is not configured to automatic startup when the Aloha boots up, then go in the Service tab of the GUI and click on the lvs setup icon.
If there is a line “no autostart”, then delete it.
Click on [OK] then [Close]
Then restart the lvs service by clicking on the restart icon.
Load balancing DNS service
This application note is intended to help you to configure the ALOHA virtual load balancer to load-balance Domain Name Servers (DNS).
Objective
Ensure high availability of a DNS service.
Reduce DNS resolution latency when the first DNS server is failing.
Constraints
You must have at least 2 DNS servers.
Complexity
1
Versions
v4.1 and later