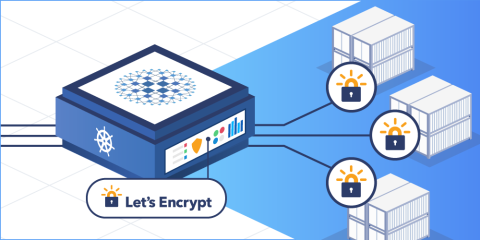
The HAProxy Kubernetes Ingress Controller integrates with the cert-manager to provide Let’s Encrypt TLS certificates.
When it comes to TLS in Kubernetes, the first thing to appreciate when you use the HAProxy Ingress Controller is that all traffic for all services traveling to your Kubernetes cluster passes through HAProxy. Requests are then routed towards the appropriate backend services depending on metadata in the request, such as the Host header. So, by enabling TLS in your ingress controller, you’re adding secure communication to all your services simultaneously. HAProxy is known for its advanced support of the important performance-oriented features available in TLS.
In this blog post, you’ll learn how to configure TLS in the ingress controller using a self-signed certificate. Then, you’ll see how to get a certificate automatically from Let’s Encrypt, which can be used in Production. Using Let’s Encrypt requires version 1.4.6 or later of the HAProxy Kubernetes Ingress Controller.
Install the Ingress Controller
The most efficient way to install the HAProxy Ingress Controller is with Helm, which we describe in the blog post Use Helm to Install the HAProxy Kubernetes Ingress Controller. Installing with Helm is as easy as invoking the following, simple commands:
| $ helm repo add haproxytech https://haproxytech.github.io/helm-charts | |
| $ helm repo update | |
| $ helm install haproxy haproxytech/kubernetes-ingress |
After the installation, you can execute kubectl get service to see that the ingress controller is running in your cluster:
| $ kubectl get service | |
| NAME TYPE CLUSTER-IP EXTERNAL-IP PORT(S) AGE | |
| haproxy-kubernetes-ingress NodePort 10.101.232.155 <none> 80:32371/TCP,443:30110/TCP,1024:32052/TCP 21h |
Notice that, by default, the internal service ports 80, 443, and 1024 are mapped to randomly assigned NodePorts. You can change this to use hardcoded NodePort numbers during the Helm install, as shown here:
| $ helm install haproxy haproxytech/kubernetes-ingress \ | |
| --set controller.service.nodePorts.http=30000 \ | |
| --set controller.service.nodePorts.https=30001 \ | |
| --set controller.service.nodePorts.stat=30002 |
Or, you can install the controller as a DaemonSet instead of a Deployment by setting the controller.kind field. At the same time, set the controller.daemonset.useHostPort field to true to expose ports 80, 443, and 1024 directly on the host.
| $ helm install haproxy haproxytech/kubernetes-ingress \ | |
| --set controller.kind=DaemonSet | |
| --set controller.daemonset.useHostPort=true |
Or, use a cloud provider’s load balancer in front of your ingress controller by setting the field controller.service.type to LoadBalancer:
| $ helm install haproxy haproxytech/kubernetes-ingress \ | |
| --set controller.service.type=LoadBalancer |
Now, let’s see how to configure TLS.
A Default TLS Certificate
When you install the ingress controller with Helm, it creates a self-signed TLS certificate, which is useful for non-production environments. Run kubectl get secret to see that it exists:
| $ kubectl get secret | |
| NAME TYPE DATA AGE | |
| haproxy-kubernetes-ingress-default-cert kubernetes.io/tls 2 2m22s |
View the certificate’s details by running the same command with the name of the secret and the output parameter set to yaml:
| $ kubectl get secret haproxy-kubernetes-ingress-default-cert -o yaml | |
| apiVersion: v1 | |
| data: | |
| tls.crt: ABCDEFG123456... | |
| tls.key: ABCDEFG123456... |
Straight away, you can access your services externally over HTTPS using this certificate. However, you’ll want to replace it with your own, trusted one for production environments, which you can do by creating a new Secret object in Kubernetes that contains your certificate and then updating the ingress controller to use it.
To see how it works, let’s create a self-signed certificate of our own. Here’s how to create a self-signed certificate using OpenSSL for a website named test.local:
| $ openssl req -x509 \ | |
| -newkey rsa:2048 \ | |
| -keyout test.local.key \ | |
| -out test.local.crt \ | |
| -days 365 \ | |
| -nodes \ | |
| -subj "/C=US/ST=Ohio/L=Columbus/O=MyCompany/CN=test.local" |
Use the kubectl create secret command to save your TLS certificate and key as a Secret in the cluster. The key and cert fields reference local files where you’ve saved your certificate and private key.
| $ kubectl create secret tls test-cert \ | |
| --key="test.local.key" \ | |
| --cert="test.local.crt" |
When you installed the HAProxy Ingress Controller, it also generated an empty ConfigMap object named haproxy-kubernetes-ingress, where haproxy is the name you gave when installing the Helm chart. Update this ConfigMap with a field named ssl-certificate that points to the Secret object you just created.
The HAProxy Ingress Controller depends on having a ConfigMap defined. You can add and delete fields from it, but you should not delete it from the cluster.
Here is an example ConfigMap object that sets the ssl-certificate field to the Secret named my-cert. Use the kubectl apply -f [FILE] command to update the ConfigMap in your cluster.
| apiVersion: v1 | |
| kind: ConfigMap | |
| metadata: | |
| name: haproxy-kubernetes-ingress | |
| namespace: haproxy-controller | |
| data: | |
| ssl-certificate: "default/test-cert" |
Now, when you access your services over HTTPS, they’ll use this TLS certificate.
Choose a Different Certificate Per Ingress
The benefit of an ingress controller is that it proxies traffic for all of the services you’d like to publish externally. The certificate you added to the ConfigMap applies across the board, but you can override it with a different certificate for each service. In that case, HAProxy uses SNI to find the right certificate.
Create a new certificate to use for a particular domain, such as api.test.local. Create a new certificate using OpenSSL:
| $ openssl req -x509 \ | |
| -newkey rsa:2048 \ | |
| -keyout api.test.local.key \ | |
| -out api.test.local.crt \ | |
| -days 365 \ | |
| -nodes \ | |
| -subj "/C=US/ST=Ohio/L=Columbus/O=MyCompany/CN=api.test.com" |
Next, add the certificate and key files to your cluster by creating a Secret object:
| $ kubectl create secret tls api-test-cert \ | |
| --key="api.test.local.key" \ | |
| --cert="api.test.local.crt" |
Then, define an Ingress object where the rules stanza applies to any request for api.test.local. Any requests for that hostname will be routed to the backend service named api-service. We’re also defining a tls stanza that configures which TLS certificate to use for this service. Its secretName field points to our new Secret object.
| apiVersion: networking.k8s.io/v1beta1 | |
| kind: Ingress | |
| metadata: | |
| name: api-ingress | |
| namespace: default | |
| spec: | |
| rules: | |
| - host: api.test.local | |
| http: | |
| paths: | |
| - path: / | |
| backend: | |
| serviceName: api-service | |
| servicePort: 80 | |
| tls: | |
| - secretName: api-test-cert | |
| hosts: | |
| - api.test.local |
Apply this with the kubectl apply -f [FILE] command and you’ll see that requests for api.test.local use this certificate rather than the one you set in the ConfigMap. Note that you can update your /etc/hosts file to resolve test.local and api.test.local to your ingress controller’s IP address. Technically, HAProxy chooses the correct certificate by using SNI, which means that once the certificate is added by one Ingress, HAProxy will use it for other routes too if they match that hostname.
Let’s Encrypt Certificates
Now that you’ve seen how to define which TLS certificate to use for a particular service, you can take this a step further by having the Secret populated automatically with a certificate from Let’s Encrypt. There’s an open-source tool called cert-manager that you’ll install into your cluster to handle communicating with the Let’s Encrypt servers.
First, be sure to deploy your cluster with a public IP address, such as by using a managed Kubernetes service like Amazon EKS and then deploying the ingress controller with a service type of LoadBalancer, which will create a cloud load balancer in front of the cluster that has a public IP. Then, create a DNS record that resolves your domain name to that IP address. You can use a service like NS1 to set up a DNS record, once you’ve purchased a domain from a domain registrar. Let’s Encrypt will need access to your service at its domain name address to send the ACME challenges. In particular, Let’s Encrypt expects your website to be listening on port 80 and will issue certificates that match your domain name.
Next, deploy cert-manager into your cluster:
| $ kubectl apply \ | |
| -f https://github.com/cert-manager/cert-manager/releases/download/v1.12.0/cert-manager.yaml |
Then, deploy a cert-manager issuer, which is responsible for getting certificates from Let’s Encrypt and validating your domain by answering ACME HTTP-01 challenges. Here’s an example YAML file to create a ClusterIssuer that’s taken, in part, from the cert-manager documentation:
| apiVersion: cert-manager.io/v1 | |
| kind: ClusterIssuer | |
| metadata: | |
| name: letsencrypt-staging | |
| spec: | |
| acme: | |
| email: myemail@company.com | |
| server: https://acme-staging-v02.api.letsencrypt.org/directory | |
| privateKeySecretRef: | |
| # Secret used to store the account's private key. | |
| name: example-issuer-account-key | |
| # Add a ACME HTTP01 challenge solver | |
| solvers: | |
| - http01: | |
| ingress: | |
| ingressClassName: haproxy |
In this example, you are creating a ClusterIssuer that can set up certificates for ingress controllers regardless of the namespace in which they run. It is configured to use the Let’s Encrypt staging server, which is the best place to work out your implementation without contacting the Let’s Encrypt production servers. Later, you can create a different ClusterIssuer that has its server field set to the real Let’s Encrypt server, https://acme-v02.api.letsencrypt.org/directory.
Next, add an Ingress object that includes the cert-manager annotation, which points to your ClusterIssuer. The cert-manager program will communicate with Let’s Encrypt and store the certificate it receives in the Secret referred to by the secretName field in the tls stanza.
| apiVersion: networking.k8s.io/v1 | |
| kind: Ingress | |
| metadata: | |
| annotations: | |
| # add an annotation indicating the issuer to use | |
| cert-manager.io/cluster-issuer: letsencrypt-staging | |
| name: mysite-ingress | |
| namespace: default | |
| spec: | |
| ingressClassName: haproxy | |
| rules: | |
| - host: mysite.com | |
| http: | |
| paths: | |
| - path: / | |
| pathType: Prefix | |
| backend: | |
| service: | |
| name: mysite-service | |
| port: | |
| number: 80 | |
| tls: | |
| - # cert-manager will store the certificate and key in this secret | |
| secretName: mysite-cert | |
| hosts: | |
| - mysite.com |
You can specify more than one host in the rules and tls sections to handle different domain names, such as mysite.com and www.mysite.com. A temporary cert-manager pod and ingress resource will be created for you to handle the HTTP-01 challenge, but are removed afterward. You can inspect this pod’s logs in case of any trouble:
| $ kubectl logs -f <cert-manager-pod> -n cert-manager |
Once set up, you won’t have to worry about manually installing certificates again!
Conclusion
In this post, you learned how to configure TLS with the HAProxy Ingress Controller, making it easy to provide secure communication for all of the clients accessing your Kubernetes services. To take it a step further, you can use a cert-manager to configure Let’s Encrypt certificates automatically.
Want to know when we publish the news? Subscribe to this blog!
Learn how HAProxy Enterprise adds enterprise-class features, professional services, and premium support to Kubernetes by contacting us. HAProxy Enterprise is the industry-leading software load balancer and powers modern application delivery at any scale and in any environment.
Subscribe to our blog. Get the latest release updates, tutorials, and deep-dives from HAProxy experts.


